Core Data
Core data use documentation
Introduction
Here we will talk about persistence of data in our iOS application. The term persistence means the data in our apps will stay even after quiting the app. In iOS we mostly use core data to store data.
What is Core Data?
You may be familiar with ralational databases like Oracle or MySQL which stores data in the form of table, row and columns, and one can access the data using SQL queries. But Core data is not relational database though SQLite database is the default persistent store for Core Data on iPhone. Core Data is a framework that allows developers to store, retrieve and access data store in it through object oriented ways. As core data does not use SQL queries we can easily map the objects.
Creating a App with Core Data
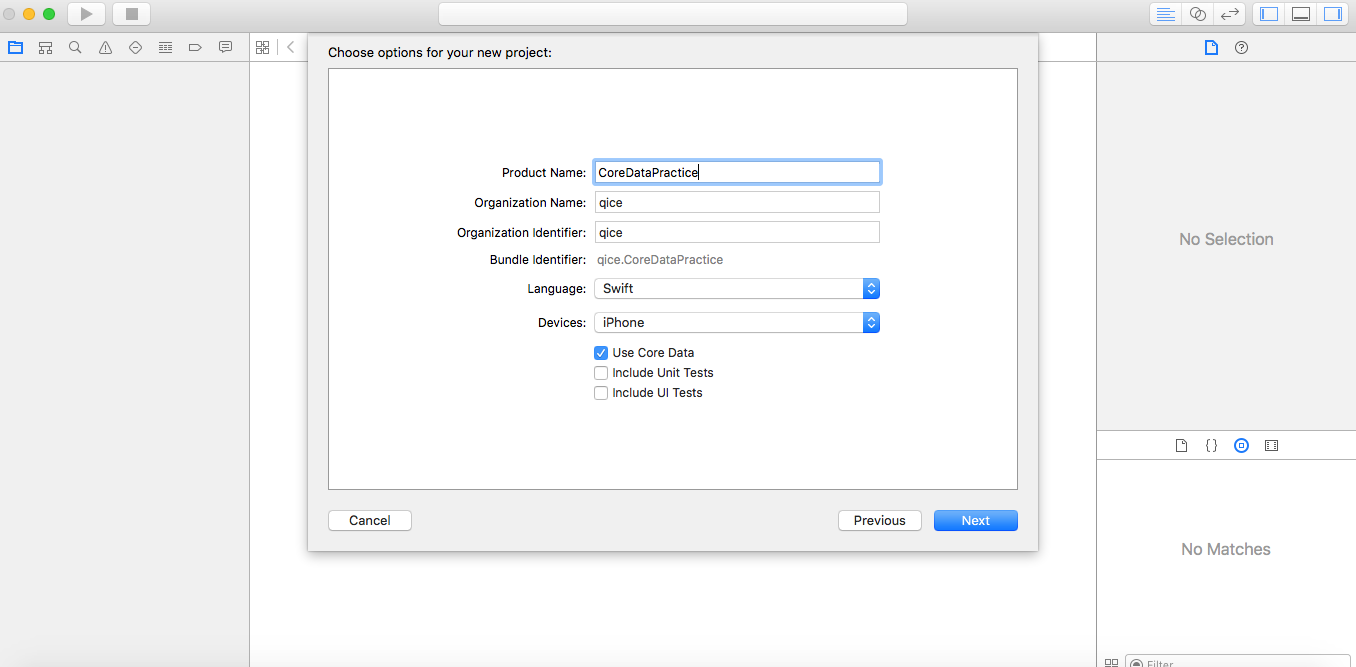
- Open Xcode and create a new project

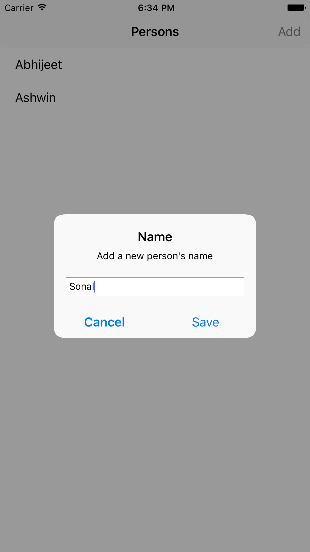
- Create a tableview and add a button in navigation bar to add names in the Persons Table.

- Add actions in ADD button to show a alert dialog and save the names in personsList.

- But the data (names) we are showing in our table view is not persistence. When we close and reopen the app we will see an empty table view.
- To make app persisentence we need to implement core data in it.
Implementing Core Data
- import CoreData in our View Controller.
- The next step is to create a managed object model, which a way Core Data represents data on disk. By default, Core Data uses an SQLite database as the persistent store, so you can think of the data model as the database schema.
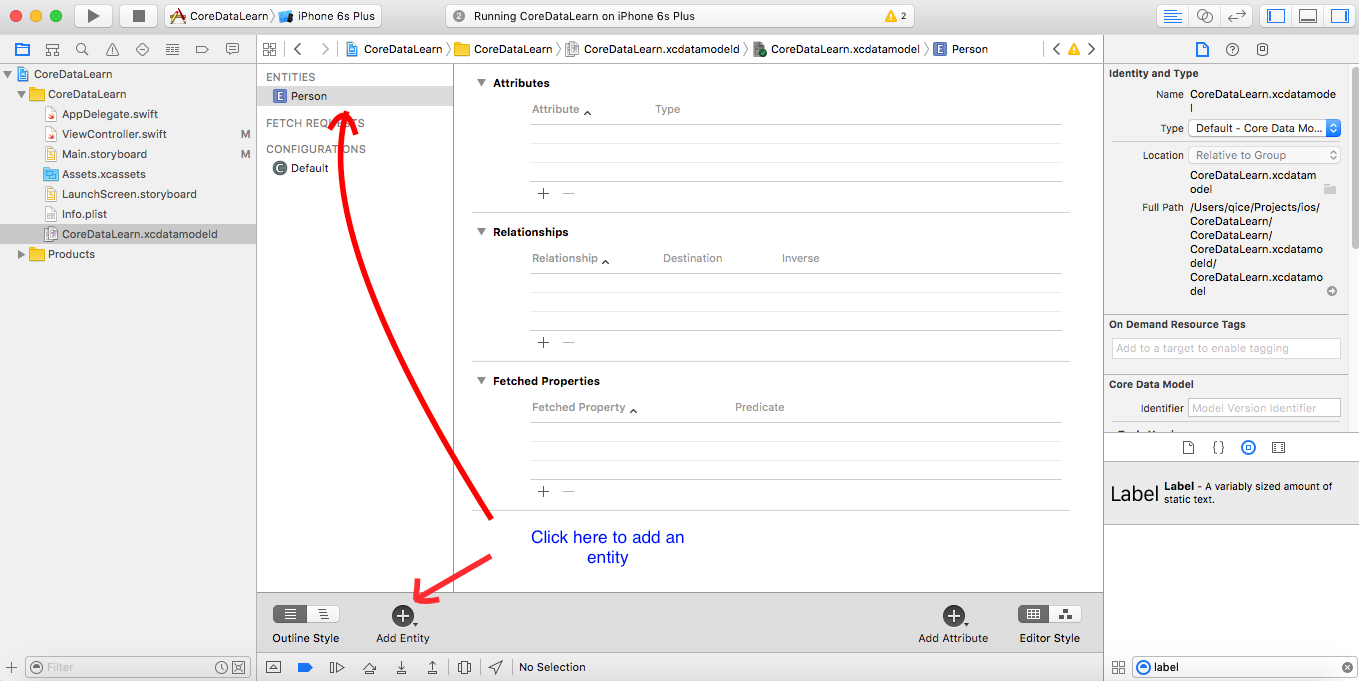
- Since we have selected Core Data while creating project. The Xcode will create a CoreDataLearn.xcdatamodeld. This is a data model file.
- Here we need to add entity Person by clecking on Add Entity button.
 An entity is similiar to table in relational database. It is a class definition in Core Data.
- The next step is to add attributes to our entity. To create an attribute click on the + symbol. Lets call it "name" to store names of person with Type as String.
- To save data in Core data a) Create a reference of AppDelegate as
let appDelegate = UIApplication.sharedApplication().delegate as! AppDelegate
b) Create managedContext from appDelegate
let managedContext = appDelegate.managedObjectContext
c) Create refrence of entity in which we want to store data. Here we are storing in "Person" entity.
let entity = NSEntityDescription.entityForName("Person", inManagedObjectContext:managedContext)
d) Next step is we need to create a new managed object and insert it into the managed object context. This is done by
let person = NSManagedObject(entity: entity!, insertIntoManagedObjectContext: managedContext)
e) With an NSManagedObject in hand, you set the name attribute using key-value coding. You have to spell the KVC key (“name” in this case) exactly as it appears on your data model, otherwise your app will crash at runtime.
person.setValue(name, forKey: "name"
f) You commit your changes to person and save to disk by calling save on the managed object context. Note that save can throw an error, which is why you call it using the try keyword and within a do block.
 do {
            try managedContext.save()
            //5
            personsList.append(person)
        } catch let error as NSError  {
            print("Could not save \(error), \(error.userInfo)")
        }
- Next step is to fetch data from core data a) Repeat step 6 (a,b) to create appDelegate and managedContext. We can define them globally. b) Create a NSFetchRequest to fetch data from an entity
let fetchRequest = NSFetchRequest(entityName: "Person")
c) You hand the fetch request over to the managed object context to do the heavy lifting. executeFetchRequest() returns an array of managed objects
do {
            let results =
                try managedContext.executeFetchRequest(fetchRequest)
            personsList = results as! [NSManagedObject]
        } catch let error as NSError {
            print("Could not fetch \(error), \(error.userInfo)")
        }
Now you are ready to store and fetch data in app. Build and run the app and add names in it. Now even after quitting and reopening the app you can see the names added.